|

DRZ 400 Lowering Kit now
available
See a testimonial
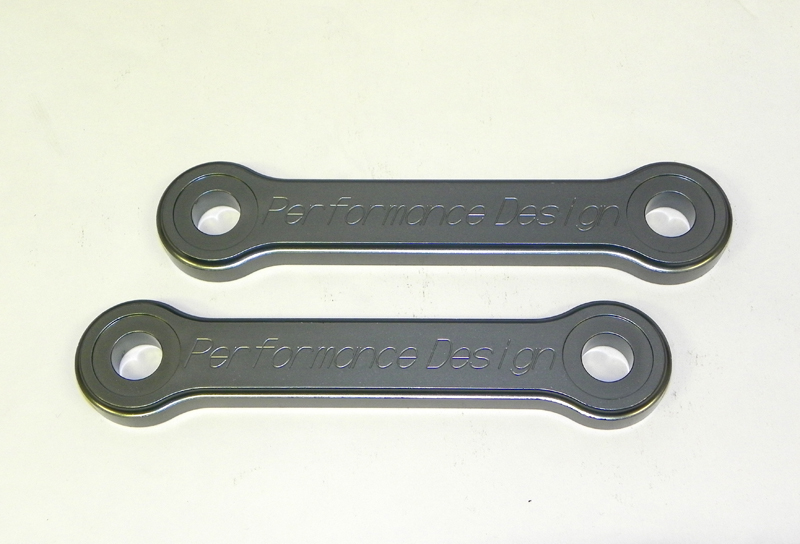
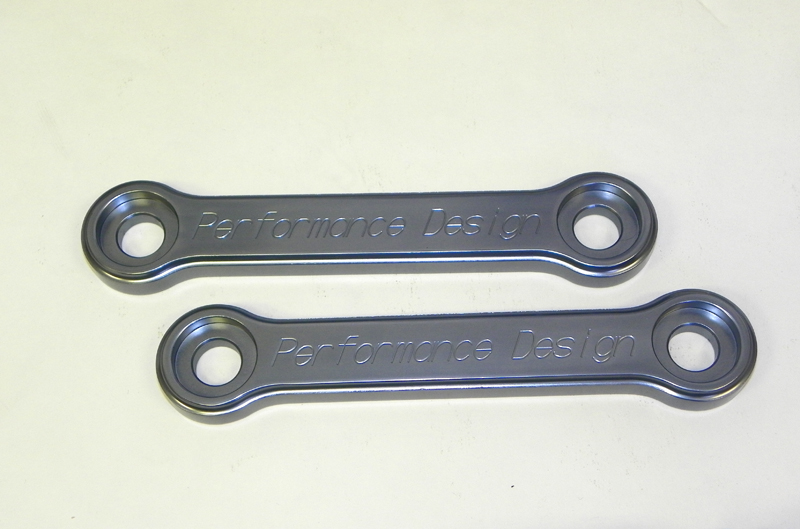
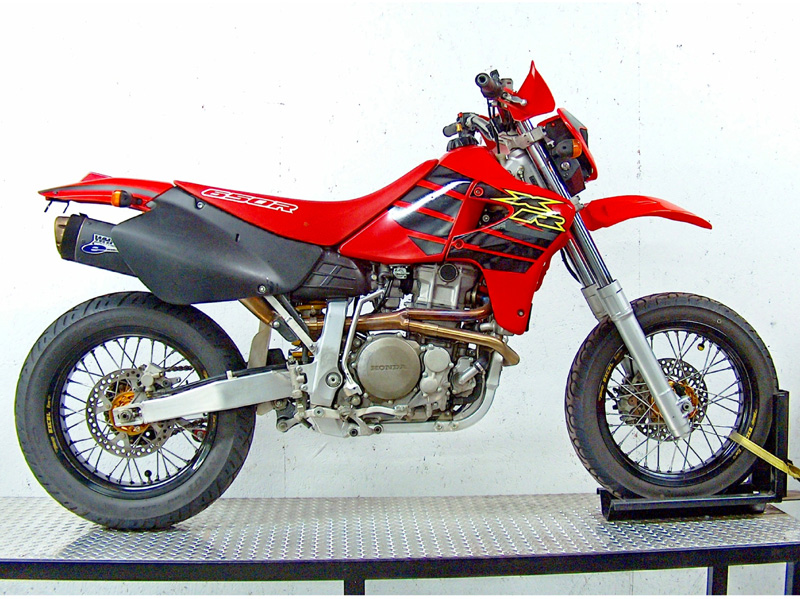
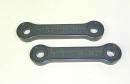
with a little different "twist" to it ! Lowering Links / Lowering Kits
When you want to lower your XR Honda or your KLR 650, you're best choice would be to install one of our lowering kits. They will greatly improve your handling , while lowering your machine at the same time. These links are much stronger than stock, & are extremely lightweight, and the bushing set-up will outlast the
OEM bearing and take more abuse without wearing than the
OEM bearing in the stock units, under normal or abusive situations. There's nothing else to purchase (such as bearings etc.) they are ready to install.
We are also
coat all our links now as well, which fights corrosion very well, along with making their appearance better.
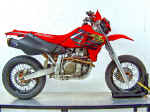
Also, if you are building a true motard or Super Moto, & really want the bike to
handle, lowering it is a must, you just don't want to get carried away
with going too low, as some lowering kits & links actually do. We put
just enough safety margin in ours that you won't have any clearance
issues due to exhaust or tire sizes or types. However I will say, in
certain circumstances you can get away with dropping them slightly lower
with no major clearance issues. The other side of the issue is, you will
however many times not have the correct suspension geometry. Will it
work ok? probably yes, unless you are a racer, or some one who really
wants the best handling possible for your dollar & time! So, be extremely
careful, if you drop the ht. any more than listed here. Also look out for
the "Brittle" type of aircraft aluminum, we know of two riders
who have already paid a very high price for using links made from it. We won't
mention the type here as they "proudly" list the type apparently
unknowingly of what they are doing. We aren`t here to cut any other
business down, so we'll leave it at that. Since we have been into metallurgy
for many many years, & do testing for many companies, we are extremely
picky about what materials we use for what components whether a suspension
part, a valve, a guide, or a connecting rod, it all matters here !!!
|
Lower Your Dual Sport
To drop the ride height without
losing any travel.
For normal everyday use, or for your Super Moto.
These lowering kits will do you
two favors.
-
They will make your Dual
Sports handling greatly improve, without causing any 'off road'
clearance problems. They also do not limit wheel travel as the
shock type lowering kits do.
-
They allow people who want
to purchase a certain Dual Sport but are just a little to
'lacking of height' to be comfortable, to go ahead and purchase
the bike then lower it and get that confidence they want.
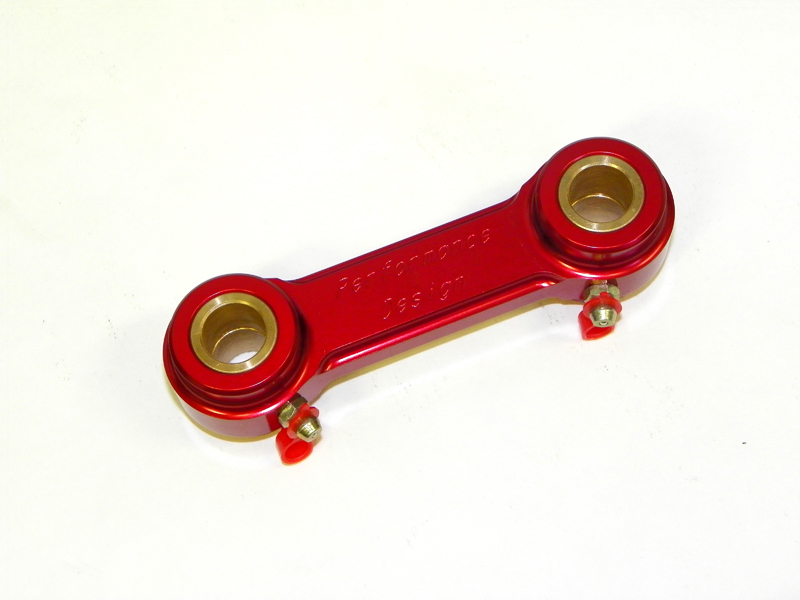
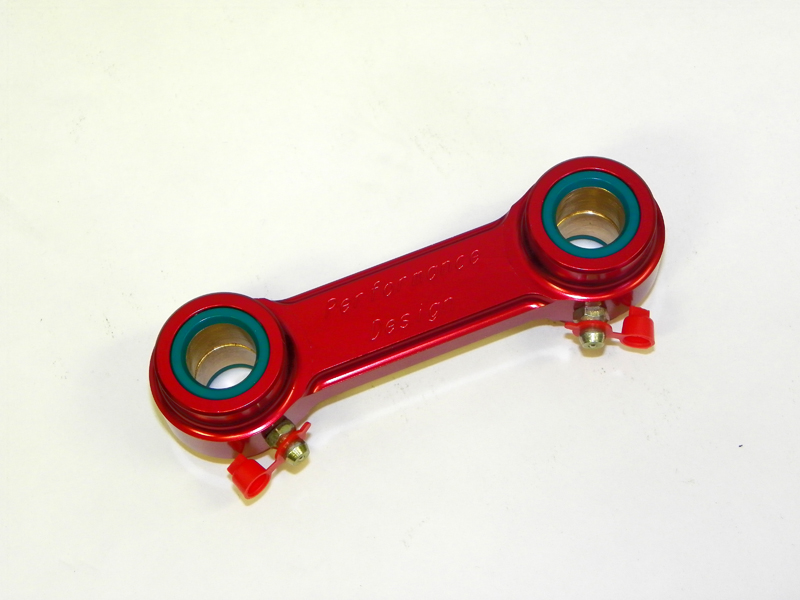
They lower the rear of the bike
from 1.5 inch to 1.75 inch, depending on how you set your preload.
You then simply move the forks up in the triple tree to lower the
front, according to the type of riding you do. The links are
CNC machined from high quality aircraft aluminum, and coated for a
first class long lasting appearance. The link is very 'over-built'
and will take whatever you dish out to them under any riding
circumstance. Included are complete easy to follow instructions. You
do not need to remove the needle bearings from the old link and use,
or buy new. They are all set up, and ready to install. The set-up in
these will out last OEM needle bearings easily, even under harsh
conditions and use!
See
the bottom for more Tech info on solid bushings/bearings verses Needle
Bearings.
Newly added
info.!!
We've
only had a few people ask about it over the last 12 years &
several thousand of the Honda links we've been manufacturing &
selling, but even for a few, we decided to put the info here for
you, just in case you are curious.
When
we manufacture the solid type bearing, the clearances are made about
the same as for a wrist pin in a piston. Therefore, if you assemble
properly, with a little grease (that we now include) & then you
put a grease gun on the fitting & grease right thereafter, you
will not be able to easily put any more in. That's the way it's
supposed to be!! You have less than .001 clearance around the collar
to the bushing/bearing. Once that cavity is full, its full. Also, we
use high quality snug seals, mainly to keep water & debris out.
This also keeps grease from easily squeezing out if its just been
properly assembled. Yes, you can still squeeze it thru, very
slowly if the grease & parts are warm. You will not need to
re-grease for many many miles of use. The solid bearings & ID
finish in them, are designed to "break in" just like the
wrist pins in pistons do after we, or any engine facility fits them
properly. We are so confident in our design, quality & fitment,
we
will replace any of our own solid bearings for the life of the bike,
to the original Lowering link purchaser, as long as its properly
assembled. Even if you very rarely ever grease it once the clearance
opens slightly, ( a few tenths of a thousandths) after "break-in",
we will still replace the bearing/bushings. You probably won't find
too many companies standing behind their design & components
like that!!!
We now
also even install neat little grease caps that fit over &
protect the grease fittings!!!
With our
lowering kits, there are no other parts to purchase for the link, they are
ready to install !!!
|
|
|
 |
 |
 |
 |
|
87-
2007 KLR 650
Lowers
the rear approx.1 & 5/8"
|
08 & up KLR 650 Lowers the rear 1 &
1/2 "s |
XR XRL 600
& 650
Lowers the rear
approx. 1&1/2" |
XR 250 &
400 Includes four new dust/grease seals
pre-installed Lowers the rear approx. 1
1/4" |
XR 650 R
99 to Current
Lowers the rear approx. 1
5/8"
READ MORE BELOW |
|
|
|
|
|
|
|
2000 & Up DRZ 400 /E/S/SM
Lowers the rear 1"
|
|
See kit pricing below
|
|
|
|
|
|
We do have new collars
available for the XR650R, just in case your collars have the needle damage to them
that they sometimes do. There is no point in spending money
you don't need to, but they are not expensive, just in case you want
to be sure "things are good" in there. The one that wears the most, we
already make a new, better one to replace it. You can find the other
two in the shopping cart. |
|
|
General
Lowering kit info.
|
|
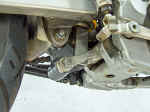
To
install all the above kits you simply support the bike underneath
the engine/skid plate area, with the rear wheel/tire just off of the
floor. You then unbolt both ends of the link(s) & allow the rear
tire to set on the floor. On the XR650R
you unbolt the three bolts holding the OEM component that looks
similar to ours, & let the rear tire set down on the
floor. You then keep following the directions that are
included, & reassemble with our component in place of the
OEM one, everything will be there that you need. You will then
loosen & slide the front fork tubes up as well, according to the
directions & retighten. Then, the most inexpensive way to
take care of the side stand, is to have your local weld shop (or
yourself if you are able) cut the foot off the side stand, cut
slightly under how much you are lowering the bike off, then re-weld it back on, scuff
the surface off, put a little paint on it, reinstall & you're
done.
|
|
|
|
|
Lowering Kits are currently
available for the following;
|
|
DRZ 400 E/S/SM 2000 & up $ 84.95
|
|
Honda XR250 XR400 PART#30010 - 96'
& UP
$ 124.95
|
|
Honda XR & XRL 600 & 650L 87'
& UP PART#
80902 $109.95
|
|
Honda XR 650 R 99
& UP Tri-Tech Link Part # 60203 $
214.95
|
|
Kawasaki KLR 650 87 to
07, Part # 70901 $ 79.95
|
|
08
& UP
Kawasaki KLR 650, Part # 70902 $ 84.95
|
|
Click
Here to Order
|
|
|
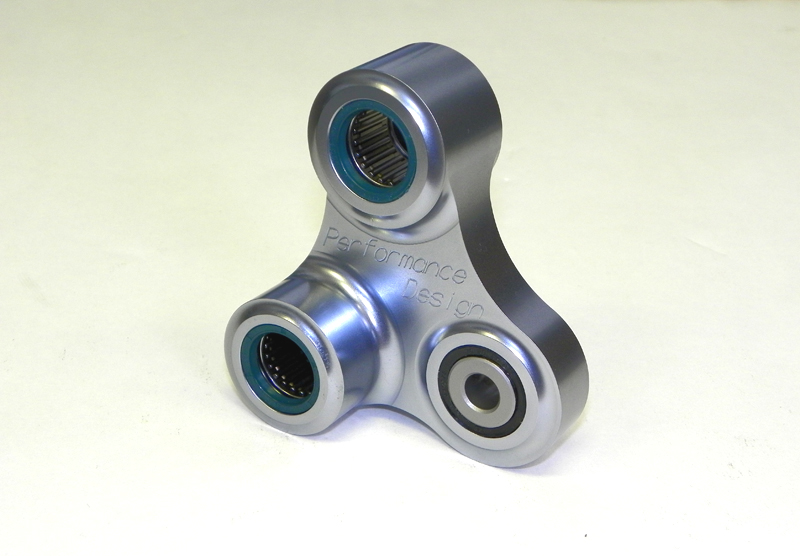
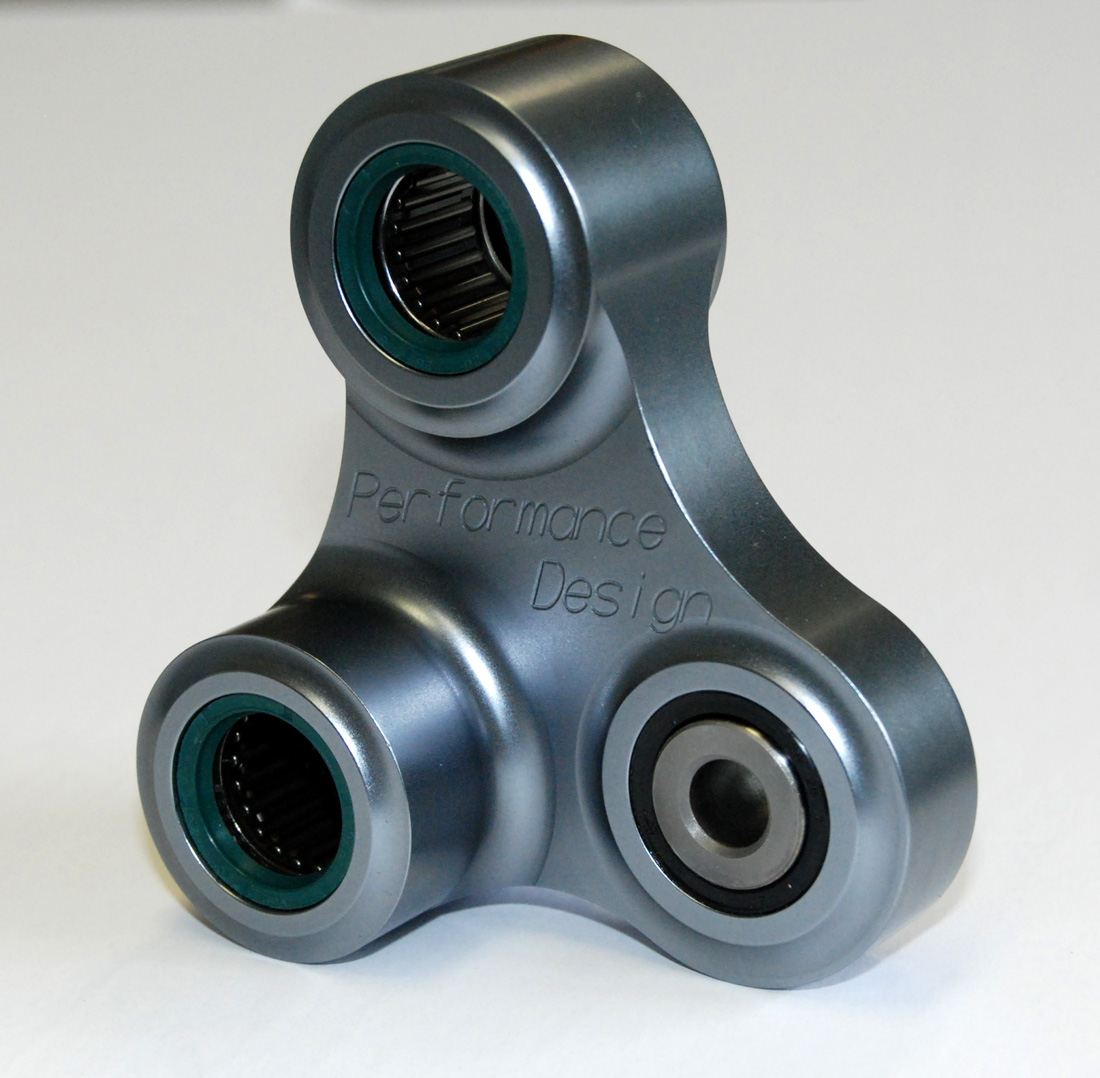
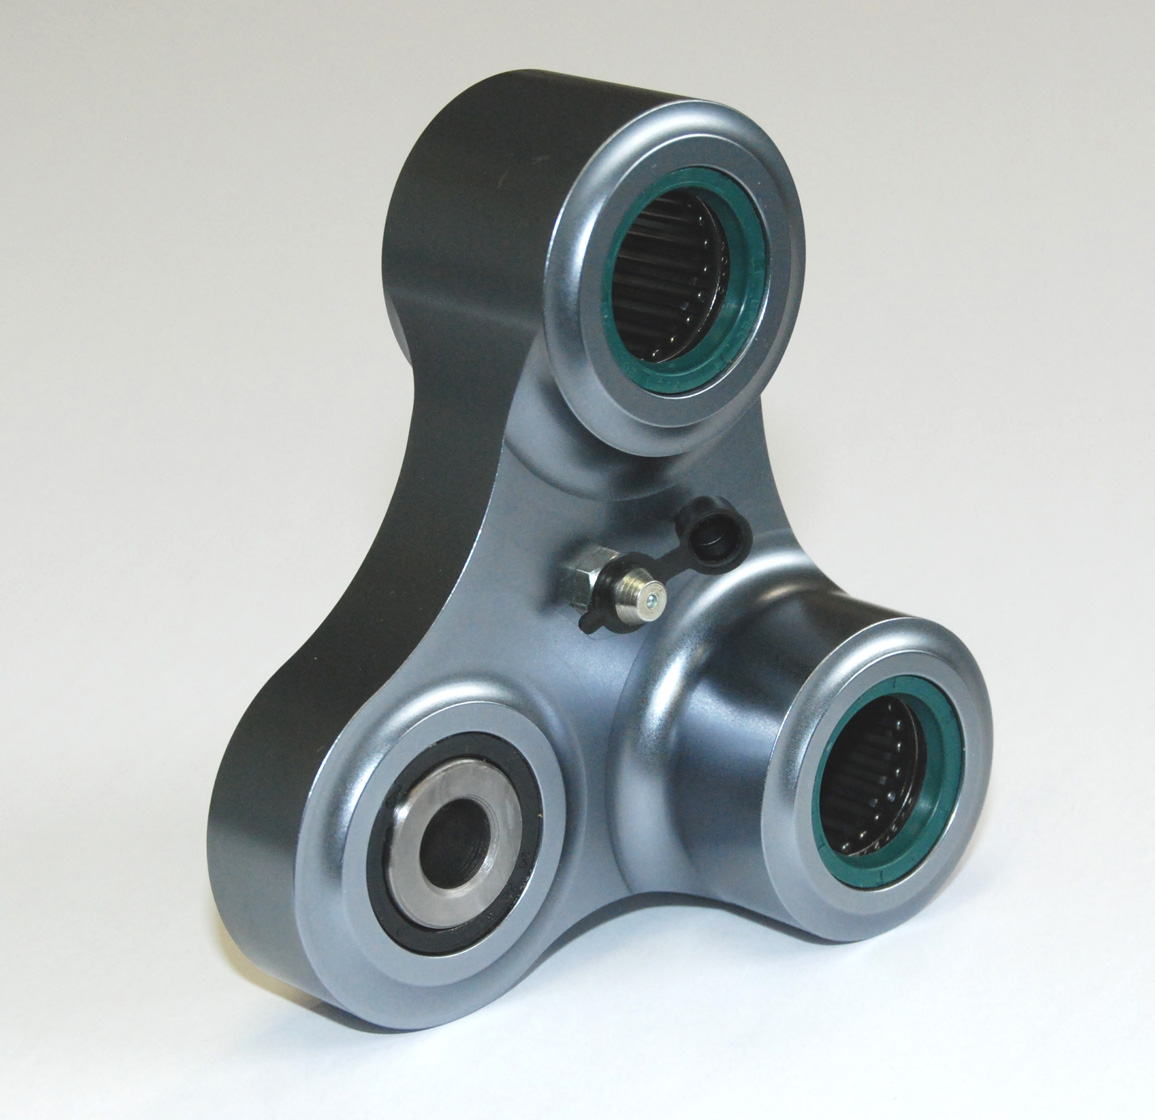
THE TRI-LINK
Introducing
our solution for properly lowering the XR650R.
There are some issues with properly lowering this bike to make it
handle better for the pavement or off-road. We ran into issues when we
first went to make a lowering kit, (in this case the two links are
integral on one end with each other). Simply changing the link length
& making them stronger etc etc, wasn�t going to work properly.
The reason is that the geometry on this bike is totally different than
the other ones. It incorporates what Honda refers to as a Cushion Arm,
or "Shock Arm". This is more or less a three pivot-point
"rocker assembly" that connects the swing arm to the Sub-Rod
assembly (the dual link component) & the Shock bottom. If you
simply design a different length dual link component you will actually
put the shock out of its proper alignment, & change the rotational
pressure properties that the "rocker assembly" puts on the
swing arm. This would not always be bad enough to cause problems, but,
for racers who demand perfect handling with perfect geometry it we
designed it another way. So, with many other bikes, changing the link
length simply changes the swing arm location, thus the ride height
which is fine in most cases. With this type set-up, doing so can open
a whole new "can of worms". We wanted the racers adjustments
to still have the proper effect on how the bike will handle. From
spring pressure, spring rate, & ride ht., to compression &
rebound dampening. Even though it is a lot more work manufacturing,
doing it the way we did meets all possible requirements of having the
geometry correct, even after lowering the bike. We won�t get into
the technical issues of ea. area of importance here, but now you can
understand at least, why we chose to do it this way instead of simply
making a different length link assembly set-up.
|

|
|
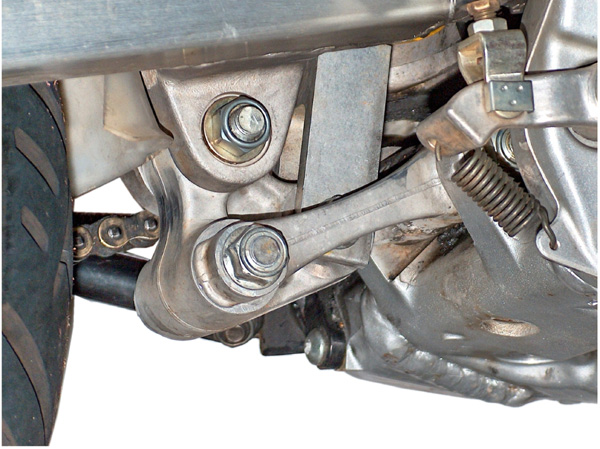
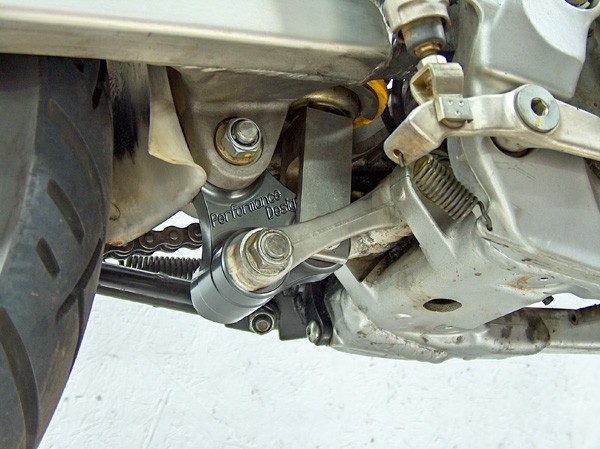
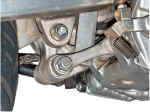
The oem XR650R
set-up. After installing our
Tri-Link. Before
lowering the XR650R After Lowering the XR650R
|
|
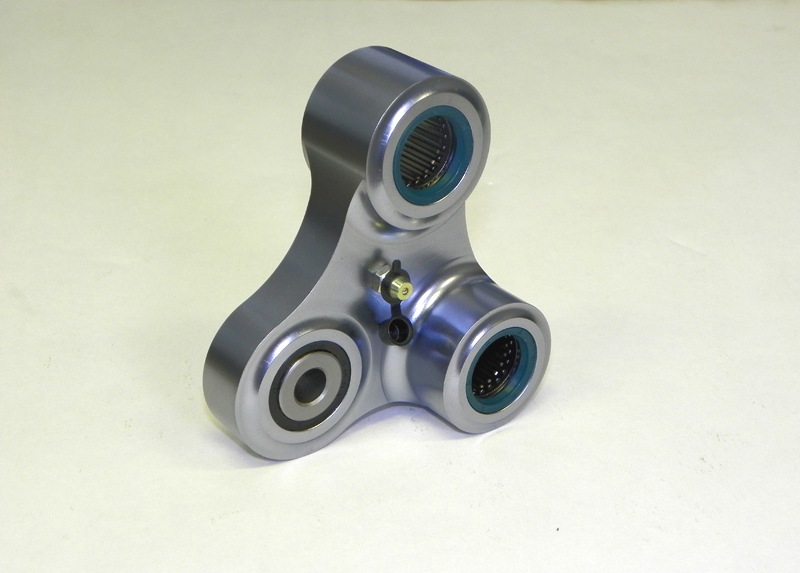
Another issue is the grease or lube issue. Putting 3 grease fittings
in would be an issue for more, reasons than one! After a lot of
R&D, we came up with a way to place a fitting where it could
be accessed, where we could also place passages to
get grease to all 4 bearings at once, (there is two in the widest
section). This makes it very convenient. The OEM link doesn�t even
have any grease fittings.
The last main issue was the OEM sleeve set-up where the bolt goes thru
to mount the shock. The OEM set-up actually has 3 separate parts that
go into the bearing inside that pivot point, which the bolt passes
thru. We noticed the oem units we inspected showed premature wear,
really for no good reason. The problem is there is not enough "bearing load area"
to ensure the bearing lasts, (read the bearing info section). Its just
not a strong, stable or long lasting set-up, if the bike is going to
get used hard. Its actually surprisingly quite lacking in design. We
addressed this issue by manufacturing a better component to slide
nicely into the bearing, to guarantee better stability & a long
lasting durable set-up. Without making the unit any wide at this area
on the Tri-Link we were able to provide a full 20% more bearing load
area. With the OEM setup, the actual needles are only 10mm long within
the 15mm wide bearing. with our much more durable set-up they are 12mm
long, within the bearing housing. We heat treat our central
collar/spacer component to the ideal
"hardness" on the "RC" scale to ensure it works
smoothly & lasts!
The end
result is a set-up that you won't have clearance issues when jumping
etc, & it will handle much better under basically any
circumstance. When you need to power-slide it while Racing Super
Motard Style it will be immensely more controllable. You will also be
able to apply much more throttle without unloading the front tire near
as much. All you racers know how important that is for quick lap
times!! Since we have a long history of building monster HP Singles,
along with all the other type Race Engines, we know what its like
trying to use a lot of power on one of these bikes. Believe me, our
Tri-Tech Link will make it seem like a whole new bike!! Our goal was
to still provide a top of the line, properly engineered component that
was easy to install, but
for a price well under what it is actually worth, & that's exactly
what we did!
|
|
|
|
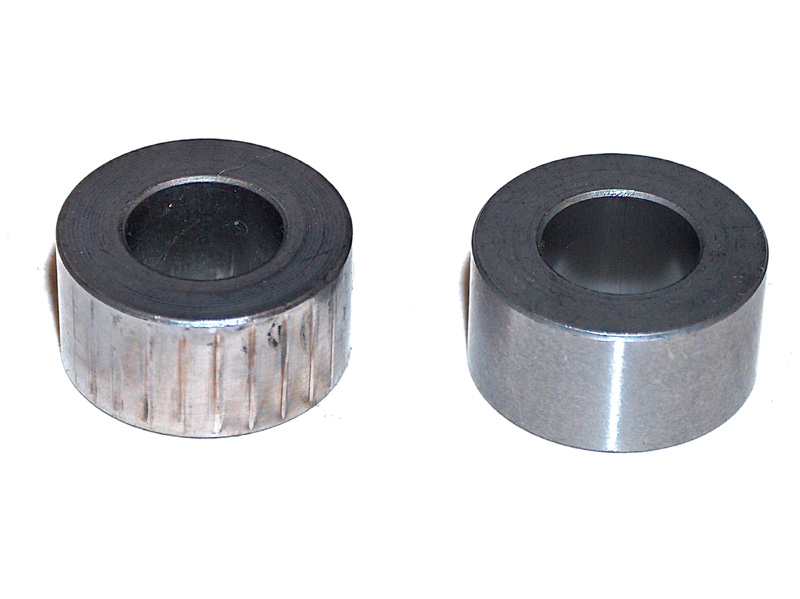
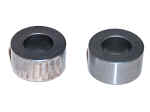
Above you can clearly see a typically worn bearing collar on the left
with a new unused one on the right. This is from an XR650R lower shock
link pivot connection. Even though it's very narrow, a high quality
Amco material solid bearing would have lasted much better than the oem
needle br. set-up here.
|
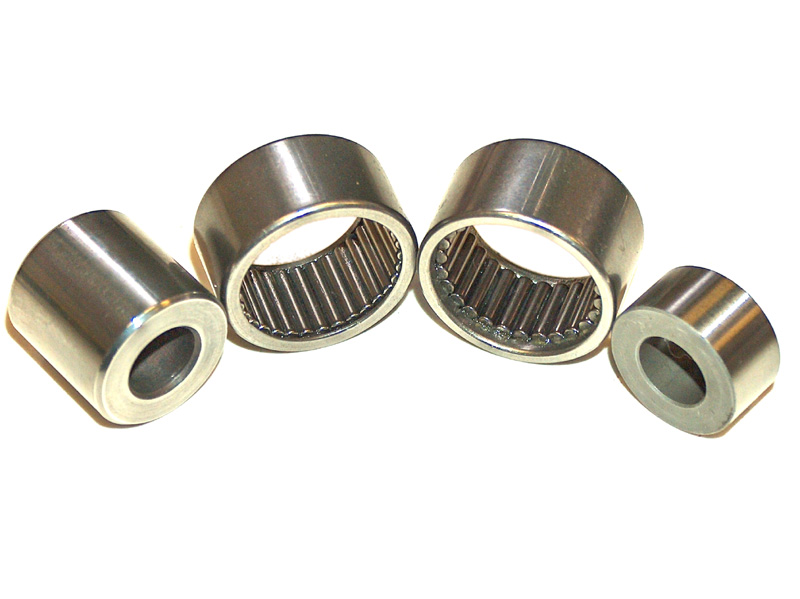
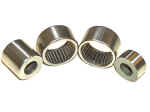
Above you can see our collar & needle bearing compared to an oem
bearing & collar on the right. All are brand new pieces when the
pic was taken. You can clearly see several things here, without being
an pro engineer or designer. First note how short the needles are on
the oem br. Also, note how small the side support rail is that holds
them in place. Our design is much more stable, & longer lasting than
the oem set-up. The much better bearing load design greatly increases
life over the oem design. If we couldn't have figured out a way of
doing this, we would have had to go to the extra expense of making
solid bearings for this pivot point, to get improved action &
durability over the poorly designed oem bearing set-up.
|
|
|
|
Needle Bearings Verses Solid bearings/bushings.
|
|
As long
as suspension parts (the pivot points) are kept clean, needle
bearings will last quite well as long as they are quality Needle
Bearings. There are a few folks out there though, (but they are definitely
not Engineers, Engine Builders, Technicians, etc.) who think the
needle bearings will take more punishment than solid bearings. They couldn't
be any more wrong. They think that bushings are used to save cost as
well, they couldn't be more uninformed!!
In
suspension applications the bearing nor any other part of the component,
completely spins or rotates. In a constant rotation application, a
needle bearing is more equally matched with a quality bushing type
bearing. But, even so, RPM, load, lubrication type, environment, preciseness
of the components involved, cost, etc etc. still will need to be considered
to make the best choice.
Bearings
are used in many applications for many purposes, because they can be
used where the components or parts have not been machined to as good
of a tolerance as they could have been. Companies can get away with
more "sloppy" clearances with needle bearings, until pressure,
load, lubrication issues & so fourth mandate they tighten up the
tolerances. Case in point this is extremely easy to illustrate. Take
for instance a connecting rod wrist-pin bushing/bearing. I use this
for example as the parts only rotate in a slight "back &
fourth" motion, no complete rotations. Here is where load,
load timing, heat, harmonics & "shock-load" are at a
max, say a supercharged Big Block making several thousand HP. Do
these folks mentioned above, know what would happen if a needle
bearing was used instead of a quality bushing, in all but special
cases? (even considering if all RC hardness & finishes were
correct for the needle bearing?). There would be total destruction of
the engine as soon as it was put under load. Some of you "techies"
know the needles would shatter the instant they were put under that
kind of load, & amount of stress, & heaven forbid if one tiny
piece of debris got in there, or they didn't have quite enough
lubrication! Yes two strokes use needles, but due to the lack of the
type load a big 4 stroke puts out, they can be used in two strokes. Considering
we have build Race Engines in almost every application for almost 30
years, we know just a "tad" on the subject anyway! Machining
bushings takes more time, the materials are fairly costly, & tolerances
must be held very close, but as long as the extra cost is justified it
sure makes for a durable product.
A simple straight
forward test;
We
took one of our test Hondas years ago, & a OEM link, & one of
ours & ran them both under fairly equal conditions. I say fairly because
we are always harder on or own products than to the other ones when
testing, so we are always 110% positive what the end result will be no
matter who might do the same test! We removed the dust seals
& ran them with no lubrication, in a sandy environment. We made
sure it was a dry environment for all tests, so that the bearings wouldn't
rust & wear do to that alone. It didn't take but a very short time
for the needles to start making their typical "cross ways"
wear marks where they touch the hardened steel OEM sleeve. (See
the pics above of a collar removed recently from an XR650R).
We replaced
those parts, but continued to run the other dry. As a matter of fact
for about a year, till we finally cleaned, installed the seals, &
greased it. This is typical though as you must remember you always
want as large a "load-bearing" area as possible, within in a
limited over all area, to distribute load over a larger area,
resulting in less stress & wear on any one area. With a solid
bearing/bushing there only needs to be a very minute amount of lube in
there to make the two parts glide over one another without even making
contact. With a needle bearing each tiny contact line is so narrow
that even when there is lube there, actual contact is very common. If
it is lacking lube, the lube is poor, or there is just slight
contamination or dirt introduced, those little wear lines appear very
quickly. A place where needle bearings can be used & last even
if "tortured" a bit, is where their size or load bearing
area is well over what it would be if the engineers were keeping the
bearing size to a minimum. If a larger & wider needle bearing than
normally put into that type arrangement, by OEM factory, is used they
can actually work very well. Also if a
typical suspension component bearing is kept lubed with clean grease,
& the dirt kept out, they will last a long time, change any
one of those points, & you'll be needing some parts shortly!
Why doesn't
the factory put grease fittings on many parts that its only logical
that they should? Well, its one more cost, & would they sell as
many replacement parts if they did?.....................Or, would they
sell as many replacement parts of they made the fitment precise &
used quality solid type bearings?................You're correct! No,
and No!
When we
make & install the solid type bearings in the suspension parts we
machine/produce, we even go as far as finishing the bearing the same
way we finish rods bushings in the factory-race level engines we
build, & the same way we finish the rod bushings in the connecting
rods we manufacture. We do it with a Sunnen Rod hone, after
they are pressed into place & can hold tolerances to within one
tenth, of one thousandths, much closer than actually needed!! We put
the exact cross-hatch pattern in with the exact grit hone stones
needed for perfect break-in (those steel sleeves can vary a bit) &
for perfect grease or lube retention. With all of our suspension
parts, whether we make the solid super precise bearings/bushings, or
we install the needle type where warranted, we don't add the extra
cost to the product. We price them as if they were needle bearings,
& we just "eat" the extra cost. Why?, we want to stay at
the top of our game, but still have very reasonable prices as well,
............period!!
|
|
|
|
DEALER INQUIRES
ARE WELCOME
|
|
|